Embroidered patches are everywhere. You see them on denim jackets, tote bags, military uniforms, and even sneakers. They add personality, fix holes, or show off logos. Learning how to make embroidered patches is easier than most people think. With some fabric, thread, and creativity, you can design patches that look professional yet stay personal.
What Are Embroidered Patches?
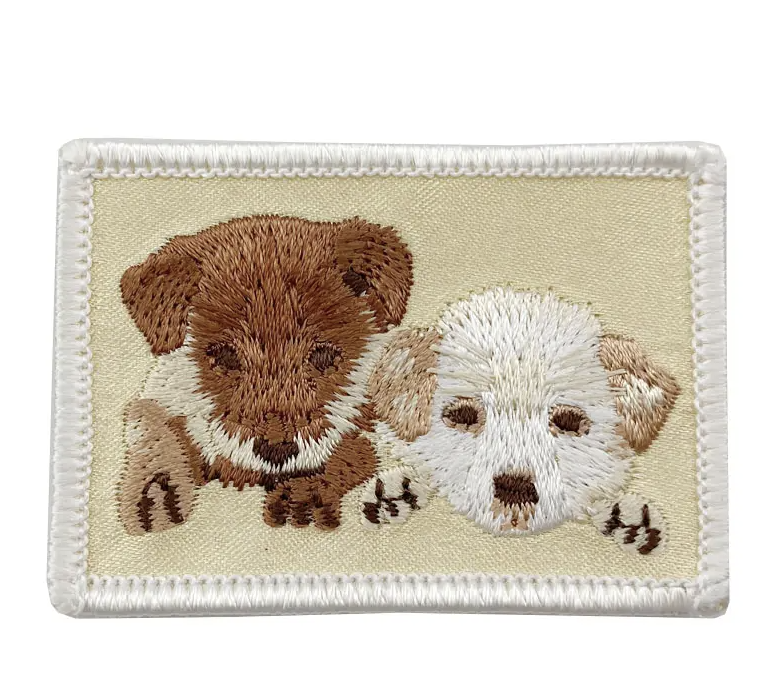
Embroidered patches are small stitched designs made on fabric. They can be attached to clothing or accessories in different ways. Many people use them for decoration, while others use them for identification.
Main types of embroidered patches:
Sew-on patches – attached with thread, permanent and strong
Iron-on patches – attached with adhesive, easy to apply
Velcro patches – removable, used for uniforms or gear
Appliqué patches – cut fabric stitched on as decorative shapes
| Patch Type | How It Attaches | Best For | Durability |
| Sew-on | Needle & thread | Everyday clothing | High |
| Iron-on | Heat adhesive | Quick fashion updates | Medium |
| Velcro | Hook & loop | Tactical gear | High |
| Appliqué | Stitched fabric | Creative designs | Medium |

Why Make Your Own Embroidered Patches?
Making your own patches saves money and lets you customize clothes. Instead of buying mass-produced designs, you create something that reflects your style.
Many people enjoy patches for these reasons:
Personalization – Add initials, logos, or fun shapes
Eco-friendly – Repair damaged clothes instead of throwing them away
Creative practice – Learn embroidery stitches on small projects
Gift ideas – Handmade patches feel thoughtful and unique
Brand identity – Small businesses or clubs use patches for recognition
Materials You’ll Need
To make embroidered patches, gather a few basic supplies. These are available at most craft or fabric stores.
Essential materials:
Fabric (felt, twill, or cotton)
Embroidery threads (cotton or metallic)
Embroidery needles
Embroidery hoop (optional for stability)
Scissors (fabric and embroidery)
Stabilizer for delicate designs
Backing material (iron-on adhesive, Velcro, or fusible web)
Design template or pattern
Tip: Felt works well for beginners because it doesn’t fray easily.
How to Make Embroidered Patches by Hand
Step 1: Choose and Transfer Your Design
The first step in creating a handmade embroidered patch is to choose a design. Opt for simple shapes like strawberries, flowers, or stars, as these are easier to work with for beginners. To transfer the design onto felt, you can use a pencil or transfer paper. Felt is an excellent choice for patches because it holds its shape well and makes cutting much easier. Additionally, felt is available in a variety of colors, allowing you to customize your patch to match your desired aesthetic.
Step 2: Outline the Patch
Once your design is transferred onto the felt, it’s time to outline the patch. Using a line stitch such as backstitch or split stitch is recommended. Outlines create clean borders, making the patch easier to cut and giving it a polished look. These stitches are also durable and will help to define the shape of your patch clearly.
Step 3: Fill the Design
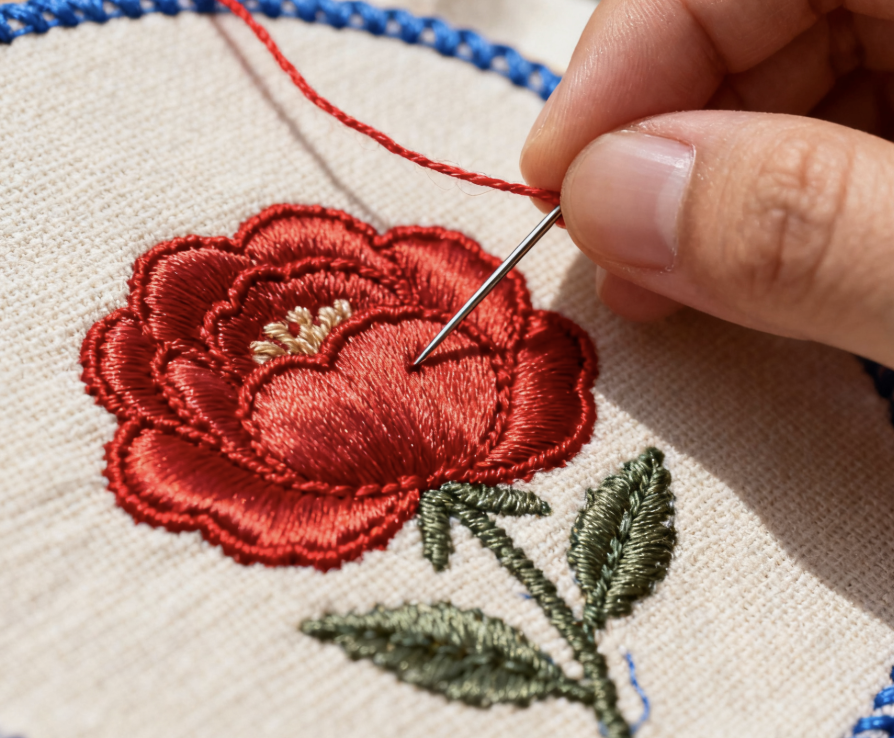
Next, fill in the design with stitches. Popular options include satin stitch, long and short stitch, or chain stitch. These stitches cover larger areas effectively and add texture to your patch. Experimenting with different stitches can create unique visual effects and enhance the overall appearance of your patch.
Step 4: Cut Out the Patch
After completing the embroidery, carefully cut out the patch. Leave a border of 3–5mm of fabric around the design to ensure stability. Using sharp embroidery scissors or an exacto knife will help you achieve neat edges. Precision in cutting is crucial to maintain the integrity of your design.
Step 5: Finish the Edges
Finishing the edges is an important step to ensure the durability of your patch. For felt patches, you can skip this step since felt does not fray easily. However, for cotton or twill patches, using a buttonhole stitch or blanket stitch is essential. These stitches keep the edges secure and prevent fraying, ensuring your patch lasts longer.

How to Make Iron-On Embroidered Patches
Iron-on patches are a convenient and quick option for those looking to create patches without the need for sewing. These patches require an adhesive backing to adhere to fabrics. Here’s how you can apply adhesive backing to your embroidered patch:
Cut the Adhesive: Cut the adhesive slightly smaller than your patch to avoid any excess sticking out.
Place the Adhesive: Place the adhesive on the back of the patch, sandwiched between non-stick sheets to protect your iron and the patch.
Heat Press: Use a heat press set at 330°F (165°C) and press for 10 seconds. Flip the patch and press again to ensure the adhesive is fully adhered.
Trim Excess Fabric: Carefully trim any excess fabric around the patch, being careful not to cut into the stitches.
Pros and Cons of Iron-On Patches:
| Pros | Cons |
| Quick to attach | May loosen after washing |
| No sewing required | Not ideal for stretchy fabrics |
| Works on most flat fabrics | Heat can damage delicate cloth |
Iron-on patches are perfect for those who want a fast and easy solution for attaching patches to clothing or accessories. However, they may not be as durable as sewn-on patches, especially if they are subjected to frequent washing.
How to Make Embroidered Patches With a Machine
For a more professional and precise look, using an embroidery machine is the way to go. Embroidery machines create high-quality patches using digitized patterns and stabilizers for support. Here’s a step-by-step guide:
Choose a Digitized Patch Design File: Select a design file that suits your needs. There are many options available online or you can create your own.
Hoop Your Fabric: Place your fabric in the embroidery hoop with a stabilizer underneath. This provides support and ensures the fabric stays taut during the embroidery process.
Run the Machine: Start the machine and let it stitch the outline and fill areas of your design. The machine will follow the digitized pattern precisely.
Finish with a Satin Stitch Border: Complete the patch with a satin stitch border to give it clean, professional-looking edges.
Machine embroidery is ideal for bulk production, as it is faster and more consistent than hand embroidery. However, hand embroidery is still preferred for unique, one-of-a-kind designs that require a personal touch. Whether you choose hand or machine embroidery, the key is to enjoy the creative process and produce a patch that reflects your style and skill.
Sew-On Method
Use needle and thread to sew around the patch edge. Baste it first if you want to position it before permanent stitching.
Iron-On Method
Place the patch adhesive side down. Press with iron for 10–15 seconds, flip garment, and press again for 20–25 seconds.
Removable Options
Care and Maintenance
Handmade patches last longer when washed carefully.
Hand wash recommended for delicate embroidery.
If using machine wash, place garments inside a mesh laundry bag.
Avoid bleach or high heat drying.
Iron patches on low heat with a cloth barrier.
Creative Ideas for Embroidered Patches
Patches can be simple or detailed. Try these ideas:
Fruits like strawberries, cherries, or lemons
Floral patterns for jackets and bags
Animals or cartoon characters
Initials or names for personalization
Travel themes like mountains, airplanes, or flags
Holiday themes: pumpkins, snowflakes, or hearts
Mix embroidery with sequins, beads, or woven patch bases to experiment.
Common Problems and Fixes When Making Embroidered Patches
Uneven Stitches
Problem: Uneven stitches can make your patch look messy and unprofessional. This often happens when the fabric tension is inconsistent during embroidery.
Fix: Using an embroidery hoop is a great solution. An embroidery hoop keeps the fabric taut and ensures even tension while you stitch. This helps create smooth, consistent stitches. Additionally, make sure to use the correct needle size and thread type for your fabric. For example, a smaller needle and finer thread work well for delicate fabrics like silk, while a larger needle and thicker thread are better for heavier fabrics like denim.
Fraying Edges
Problem: Fraying edges can ruin the appearance of your patch, especially if it’s made from fabrics like cotton or twill that are prone to fraying.
Fix: Adding a buttonhole stitch or blanket stitch border is an effective way to prevent fraying. These stitches create a durable edge that keeps the fabric intact. If you’re using a machine, a zigzag stitch can also work well. For hand embroidery, practice your stitching technique to ensure the edges are secure. Using a high-quality thread can also enhance the durability of the edges.
Patch Not Sticking
Problem: If you’re making iron-on patches, sometimes the patch might not stick properly to the fabric. This can be frustrating, especially if you’ve put in a lot of effort into creating the patch.
Fix: Increasing the heat press time slightly can help ensure the adhesive is fully activated. Make sure to follow the manufacturer’s instructions for the specific adhesive you’re using, but generally, an additional 5-10 seconds on each side should do the trick. Also, ensure that the fabric is clean and dry before applying the patch. If the fabric is damp or dirty, it can prevent the adhesive from adhering properly.
Wrinkling After Wash
Problem: Wrinkling after washing can make your patch look old and worn out quickly. This is particularly an issue with fabrics that shrink or wrinkle easily.
Fix: Hand washing your patches can help prevent wrinkles and maintain their appearance. Gently wash the patch in lukewarm water with a mild detergent, then lay it flat to dry. If wrinkles do occur, you can reseal the patch with an iron. Place a clean cloth over the patch to protect it from direct heat, then press gently with a warm iron. This can help smooth out any wrinkles and restore the patch to its original condition.
FAQs
What fabric works best for patches?
Felt, twill, and cotton are most common.
Can I make patches without a hoop?
Yes, especially on felt, but a hoop helps with tension.
How do I make patches washable?
Finish edges securely and wash by hand when possible.
What’s the difference between embroidered and woven patches?
Embroidered patches use raised stitches. Woven patches are flat and detailed.
Can I turn embroidery into iron-on patches?
Yes, by applying iron-on adhesive backing.
Conclusion
Making embroidered patches at home is fun, affordable, and creative. Anyone can design patches with fabric, thread, and simple tools. Some people prefer sewing, while others like iron-on adhesives. For larger projects or bulk orders, embroidery machines provide speed and precision.
If you’re looking for professional-quality results beyond DIY, Huisui International Industrial Ltd. is your trusted partner. The company specializes in custom embroidered patches, woven patches, and sequin patches, helping brands, clubs, and individuals bring their designs to life with precision craftsmanship. Whether you need small batches or large-scale production, Huisui delivers durable, stylish, and high-quality patches tailored to your needs.


